![[Node.js] heroku(헤로쿠) 배포하기](https://img1.daumcdn.net/thumb/R750x0/?scode=mtistory2&fname=https%3A%2F%2Fblog.kakaocdn.net%2Fdna%2FcqFwIb%2FbtqIyeo8Rfa%2FAAAAAAAAAAAAAAAAAAAAAJbHmqihKkNs6NeWXf2Mc1NzLYPwcJBNBjt-8oySDkSq%2Fimg.png%3Fcredential%3DyqXZFxpELC7KVnFOS48ylbz2pIh7yKj8%26expires%3D1785509999%26allow_ip%3D%26allow_referer%3D%26signature%3DMGAD3AHzm741BsFb7GnbxLIkReI%253D)
본 글은 2020.09.13에 최종 수정되었습니다. 참고 바랍니다.
본문에 앞서
- 본 글은 Node.js의 express 서버를 heroku를 이용하여 배포하는 방법에 대한 가이드를 제시하는 내용이 담겨 있습니다. 필수적인 내용에 대한 설명은 적으려고 노력했으나, 리눅스 명령어나 express 서버, heroku에 대한 깊은 내용을 다루지는 않습니다. 참고 바랍니다.
- 개발 환경은 WSL2를 쓰기 때문에 Linux 운영체제 기반으로 설치를 했습니다. Windows 운영체제를 사용하신다면 도움이 되지 않을 수 있습니다.
- heroku 웹 상에서도 배포가 가능하지만, CLI로 하는 것이 더욱 많은 기능을 편리하게 이용할 수 있어서 CLI 기반으로 배포를 진행했습니다. 참고 바랍니다.
개발 환경
- node.js 12.16.2
- heroku 7.42.13
- ubuntu 20.04
- git 2.25.1
Node.js의 express 서버를 heroku를 이용하여 배포하는 방법
1. Git 설치 (이미 설치된 분이시라면 생략해주세요.)
$ sudo apt-get install git
2. curl 설치 (이미 설치되신 분이라면 생략해주세요.)
$ sudo apt-get install curl
3. curl 기반 heroku CLI 설치
$ curl <https://cli-assets.heroku.com/install.sh> | sh
4. npm 명령어로 heroku 설치 (배포를 위한 글을 보러 오신 분들은 이미 npm이 설치되어 있다고 가정했습니다. 설치가 되지 않았다면 npm을 설치 후 명령어를 실행해주세요.)
$ sudo npm install -g heroku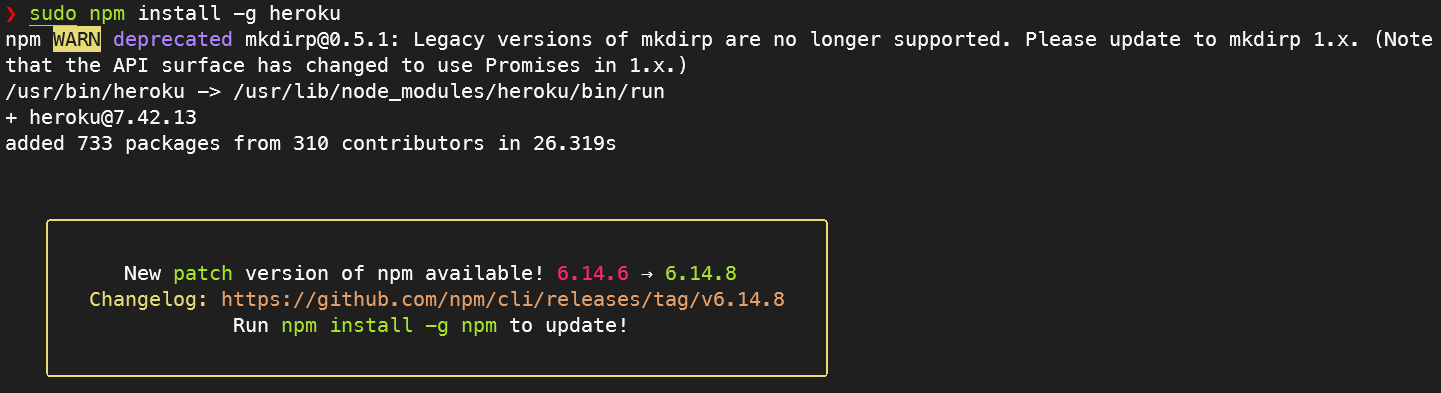
5. heroku가 정상적으로 설치되었는지 확인
$ heroku --version
6. 헤로쿠 계정 생성
https://www.heroku.com/ 가서 계정을 생성해주세요.
7. app 생성
(1) 우선, 생성한 계정으로 heroku 로그인해주세요. 정상적으로 로그인되었을 경우, dashboard로 이동됩니다.
(2) dashboard 페이지 우측 상단에 보이는 New 클릭 - Create new App 클릭해주세요.

(3)
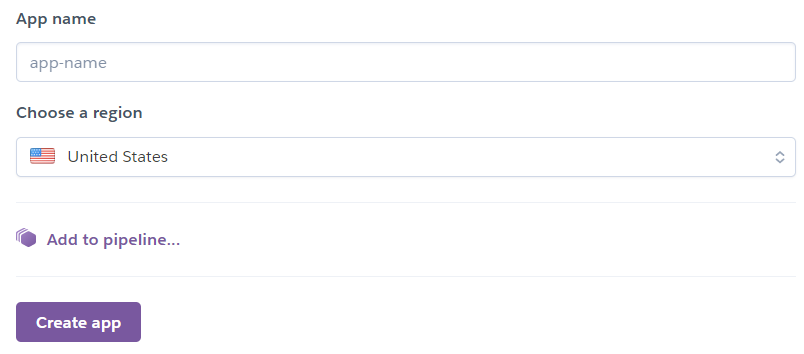
- App name : 프로젝트의 이름을 써주는 공간입니다. 다만, 해당 App name으로 도메인이 결정되는 것을 알아두셔야 합니다.
가령, App name을 test-project라고 하셨다면 배포된 사이트의 링크는 test-project.herokuapp.com이 됩니다.
- Choose a region : 기본값으로 설정되어 있는 US로 두시면 됩니다.
- 작성을 완료하셨다면 Create app을 클릭해주세요. 이로써 app이 생성되었습니다.
8. 터미널에서 아래 명령어 수행 후, 아무 키나 누르기. → 이후, 로그인 사이트가 뜨면 로그인 버튼 클릭.
$ heroku login
9. 배포하고자 하는 디렉토리로 이동 후, 아래 명령어 수행. 로컬에 있는 디렉토리를 heroku 내 원격저장소에 연결하는 과정입니다.
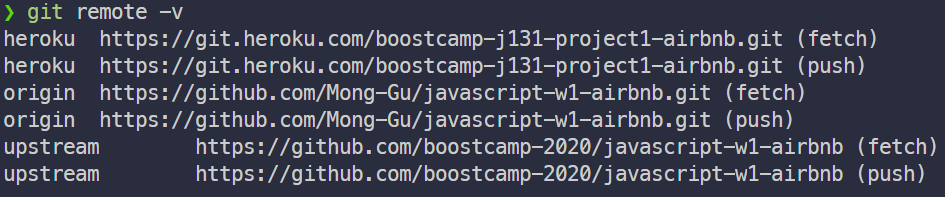
$ heroku git:remote -a [app name]저는 heroku 사이트에서 app 이름을 boostcamp-j131-project1-airbnb로 만들었기 때문에, 아래와 같이 명령어를 썼습니다. 그러면 아래 set git remote heroku to ~이라는 문구가 뜹니다.
$ heroku git:remote -a boostcamp-j131-project1-airbnb
set git remote heroku to <https://git.heroku.com/boostcamp-j131-project1-airbnb.git>
git remote -v 명령어를 통해 연결된 원격저장소를 확인해보면 heroku가 추가된 것을 알 수 있습니다.
10. 연결된 로컬 디렉토리 내 파일들을 heroku 원격 저장소로 push해주세요. 이때 [브랜치] 안에는 푸시하고자 하는 브랜치를 넣으면 됩니다.
$ git push heroku [브랜치]현재 push할 수 있는 브랜치는 무엇이 있나 확인해봅시다.
$ git branch -a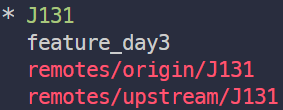
현재 feature_day3 브랜치에서 작업 중이라 이것이 최신 버전이지만, 아직 안전하지 않은 버전입니다. 안전한 것을 확인했던 J131 브랜치를 배포하도록 하겠습니다. 만약 브랜치 이름이 master 혹은 main이 아닐 경우, git push heroku J131 만으로는 build되지 않습니다. 그래서 임의로 "heroku의 master 브랜치에 push 해줄 로컬의 브랜치가 이것이다"라고 명시해줘야 하는데요. 그 명령어는 다음과 같습니다.
$ git push heroku [배포하고자 하는 로컬 내 브랜치]:master$ git push heroku J131:master
오브젝트 나열하는 중: 2276, 완료.
오브젝트 개수 세는 중: 100% (2276/2276), 완료.
Delta compression using up to 8 threads
오브젝트 압축하는 중: 100% (1644/1644), 완료.
오브젝트 쓰는 중: 100% (2276/2276), 2.15 MiB | 1.64 MiB/s, 완료.
Total 2276 (delta 507), reused 2205 (delta 483)
remote: Compressing source files... done.
remote: Building source:
remote:
remote: -----> Node.js app detected
remote:
remote: -----> Creating runtime environment
remote:
remote: NPM_CONFIG_LOGLEVEL=error
remote: NODE_ENV=production
remote: NODE_MODULES_CACHE=true
remote: NODE_VERBOSE=false
remote:
remote: -----> Installing binaries
remote: engines.node (package.json): unspecified
remote: engines.npm (package.json): unspecified (use default)
remote:
remote: Resolving node version 12.x...
remote: Downloading and installing node 12.18.3...
remote: Using default npm version: 6.14.6
remote:
remote: -----> Installing dependencies
remote: Installing node modules (package.json + package-lock)
remote:
remote: > nodemon@2.0.4 postinstall /tmp/build_e8b8dcb7/node_modules/nodemon
remote: > node bin/postinstall || exit 0
remote:
remote: Love nodemon? You can now support the project via the open collective:
remote: > https://opencollective.com/nodemon/donate
remote:
remote: added 216 packages from 104 contributors and audited 218 packages in 6.016s
remote:
remote: 13 packages are looking for funding
remote: run `npm fund` for details
remote:
remote: found 0 vulnerabilities
remote:
remote:
remote: -----> Build
remote:
remote: -----> Caching build
remote: - node_modules
remote:
remote: -----> Pruning devDependencies
remote: audited 218 packages in 1.89s
remote:
remote: 13 packages are looking for funding
remote: run `npm fund` for details
remote:
remote: found 0 vulnerabilities
remote:
remote:
remote: -----> Build succeeded!
remote: -----> Discovering process types
remote: Procfile declares types -> (none)
remote: Default types for buildpack -> web
remote:
remote: -----> Compressing...
remote: Done: 25.3M
remote: -----> Launching...
remote: Released v3
remote: https://boostcamp-j131-project1-airbnb.herokuapp.com/ deployed to Heroku
remote:
remote: Verifying deploy... done.
To https://git.heroku.com/boostcamp-j131-project1-airbnb.git
* [new branch] J131 -> master
11. push까지 끝나면 배포는 완료되었습니다. 배포된 링크로 이동해서 확인하시면 정상적으로 메인 페이지가 보이실 겁니다. 하지만 하나 더 해줘야 할 일이 있는데, 자고 있는(sleep) 상태의 dyno를 깨워주는 명령어를 수행해줘야 합니다. 깨워주지 않으면 배포된 웹 서비스에서 request를 받지 못합니다.
heroku ps:scale web=1
12. 배포한 프로젝트를 확인하기 위해 링크로 들어가는 방법은 다음과 같습니다.
(1) 직접 타이핑 : https://[heroku dashboard에 보이는 app이름].herokuapp.com/
ex) https://boostcamp-j131-project1-airbnb.herokuapp.com/
(2) heroku dashboard에서 app을 클릭 → 우측 상단에 위치하는 open app 버튼 클릭
(3) heroku 명령어 : 터미널에서 heroku open을 실행하면 app의 home이 자동으로 열려야 합니다. 하지만 WSL2에서는 어떤 이슈인지는 모르겠지만 error opening web browser.를 자꾸 내뱉어서 수동으로 들어가라고 url을 보여줍니다. 정상적으로 heroku 명령어가 작동되면 그렇게 이용하시면 되고, 수동으로 url을 보여주신다면 해당 url로 접속하시면 됩니다.
13. 배포의 모든 흐름은 끝이 났습니다. 추가적으로 말씀드릴 사항이 있는데, 배포 과정 중 에러가 생기면 아래 명령어를 통해 확인해주세요.
$ heroku logs

# -n 옵션을 주면 설정한 숫자만큼 최근에 발생한 log를 확인할 수 있음
# ex) $ heroku logs -n 10

# --tail 옵션을 주면 log 출력 후, 계속 log를 볼 수 있도록 log창이 꺼지지 않음
# ex) $ heroku logs --tail
reference
🙈[Node.js] Heroku로 배포( deploy )하기🐵